appropriate pages as photos and captions.
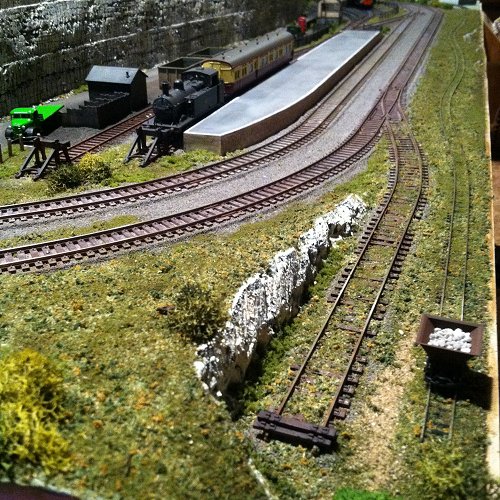
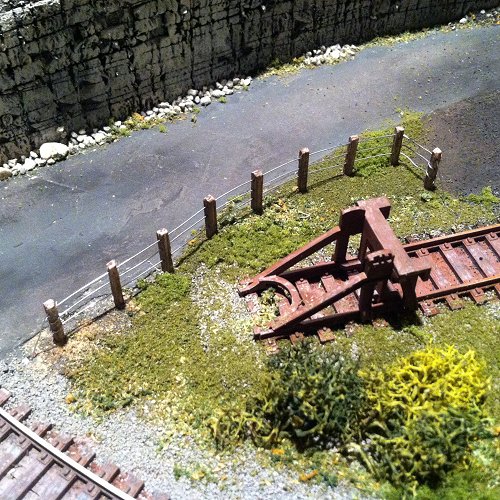
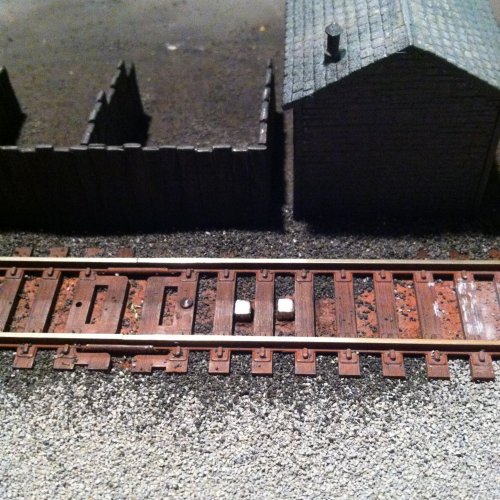
Fencing again and developement of the mine
over the floor and over the foam rock walls in the cavern. The floor has been given a first thin wash of raw umber. I'll do the
same on the walls, wiping off for the highlights and to create more defined texture.
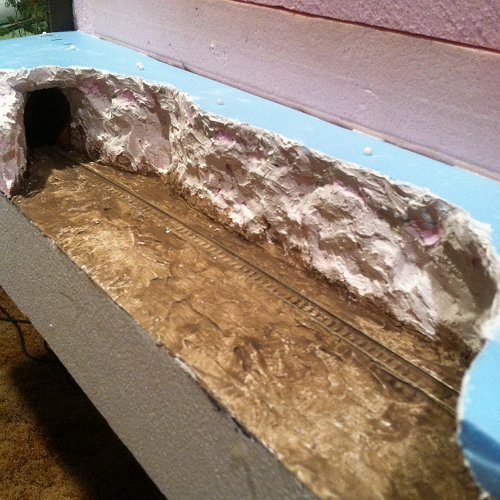
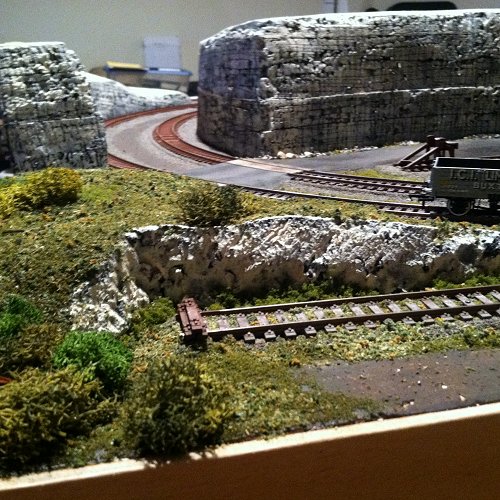
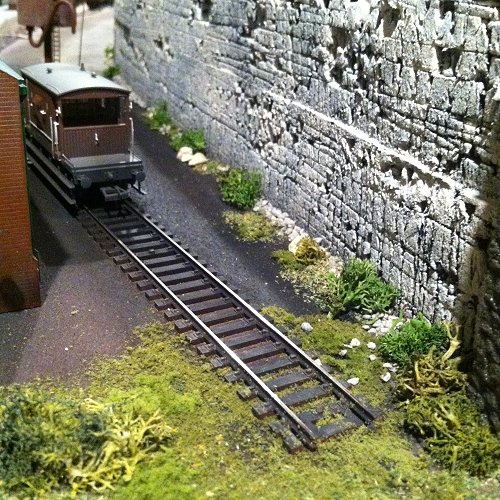
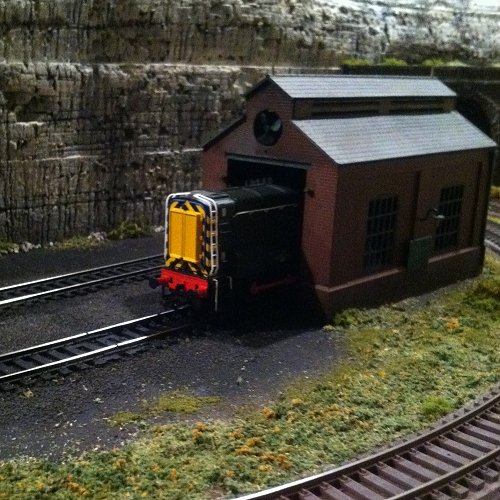
The narrow gauge mine
another scenic area and just have some fun with it. The adit entrance is lined with left over corrugated iron from the Nissen hut
kits. The track will be covered with filler in this area. The mine floor being a sort of dirty limestone dried mud.
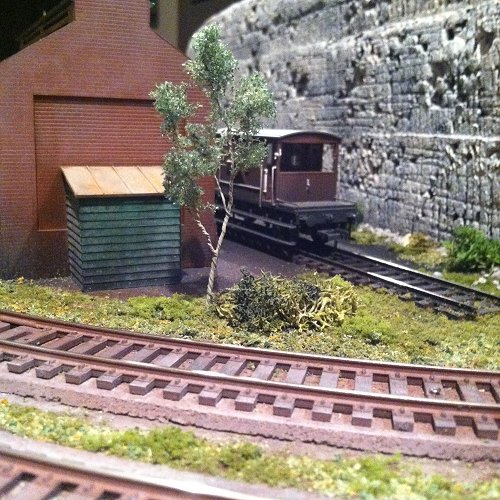
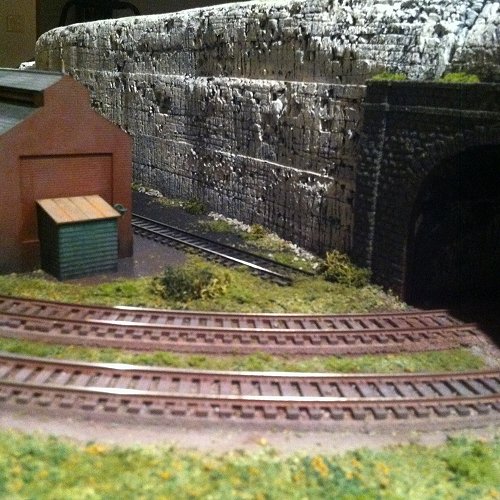
Narrow gauge beginnings
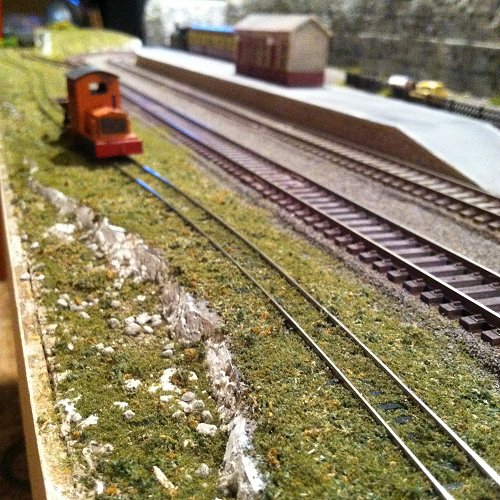
I'll be adding a lot more scrub, bushes, and trees to isolate the mine line further from the main lines. On the right is the scenic
development of the area of foam that was cut away (see below).
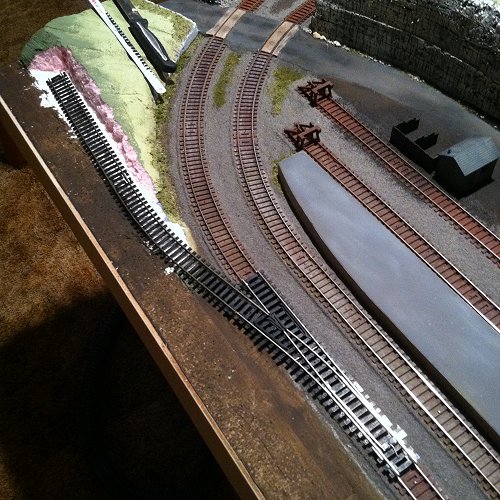
Narrow gauge beginnings
which I'm simply gluing to the foam base with Tacky Glue. I made my usual modification to the point which involves soldering
two jump wires underneath. The track will run all along the front of the layout. I test ran the Plymouth on this section after the
glue dried and it ran very smoothly. This N-scale loco will be converted into (most likely) a freelance narrow gauge mine loco of
some sort.
Vehicles on the layout
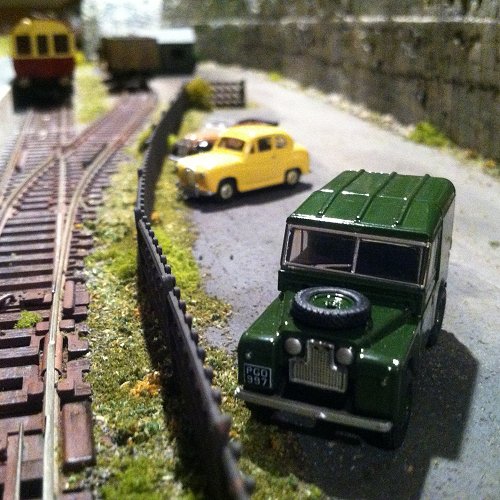
vehicles. Although very clean (weathering to be done) they look good around Miller's Dale station. The Mk.1 Land Rover is a
telephone service engineer's vehicle. He's checking some problem with the telephone kiosk. Austin A35 in the background. By
the signal box is a smart little Ford Popular. The box operator borrowed it from his brother-in-law for the day.
Constructing some post-and-rail fencing
and wire fencing. The rails are cut from 1/64" ply and about 1/16" width. As you can see I erected the posts first this time and
used CA glue to attach the rails in lengths sufficient to stretch between five posts. I decided to build the fence before painting so
that the glue was attaching wood to wood. I'll paint these next with a thin dark grey acryic and highlight with pastel.
Telephone box
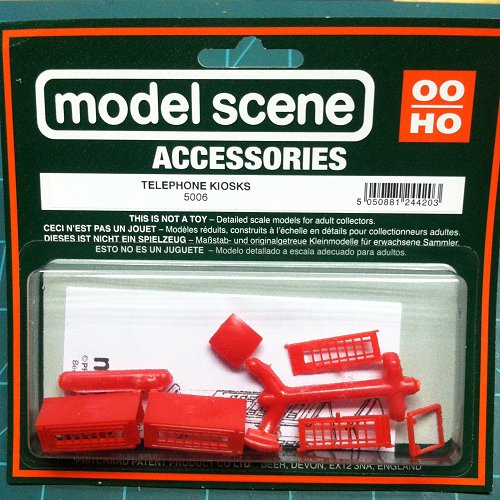
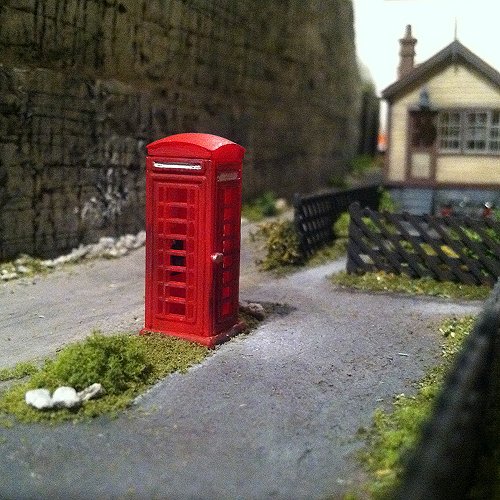
acrylic, adding a few painted details painted, plus weathering they look really good. I created a small grass verge at one end of the
station car park to display this nice little model.
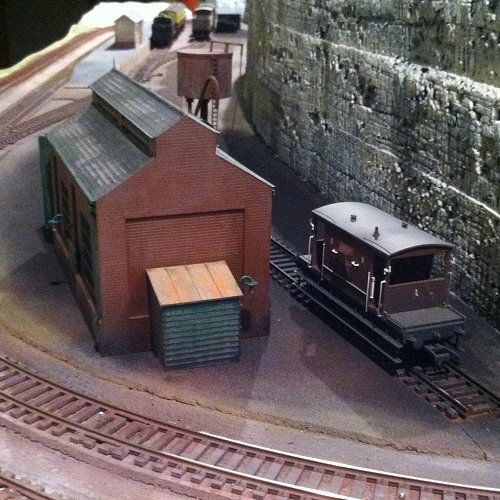
Nissen huts for the narrow gauge scene
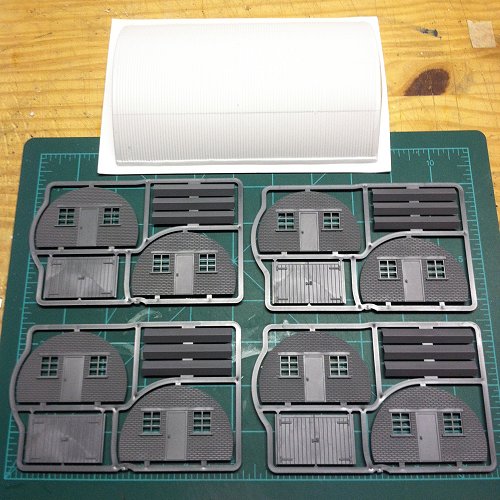
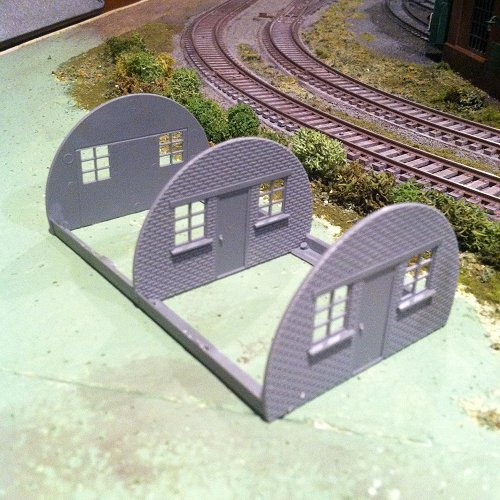
different lengths and with different end wall configurations. On the right is a two bay structure which is the length I'm going to
build. Extra end walls are used as support structures inside. I'm thinking of building the other one with open double doors and
will therefore make a skeletal roof support instead.
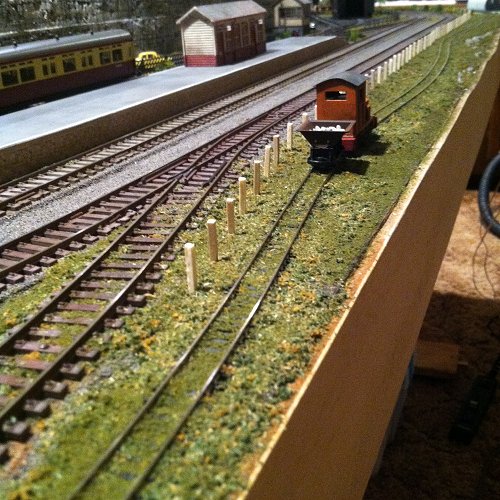
First hand built wire fencing
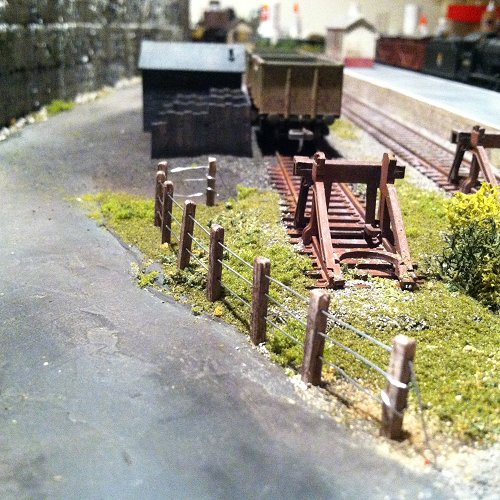
fences vary) but worth it to save the effort of cutting my own sticks. Each post stands 15mm from the top to the ground. The
posts are drilled with three 1/32" holes. The fence wires are set at 4mm (1 foot in scale) apart. I first pushed the posts into pre-
formed holes in my foam baseboard, then threaded the wire through them. The top wire at each end post is pushed into the foam
to create the typical wire brace that's seen on such fences. I've also done some extra lansdcaping in this area which is the end of
the platform 2 track and the coal merchant siding. I'm really enjoying how each extra detail brings the scenes to life.
Long term 0-6-0 Loco over points problem solved, I hope!
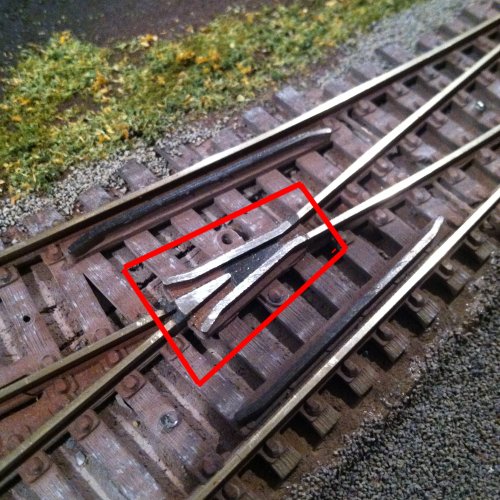
get my Jinty to travel through certain points. Packing and levelling would work for awhile then the trouble would return. I worked
on the loco pickups with success then the stalling would start again. I just bought a new (older stock) Bachmann J39 0-6-0 which
seems to be more sensitive to the problem as it doesn't have a sprung middle axle. Then I happenned to wonder how level the
transition from rail to the cast frog on these Atlas points is. I discovered that some are flat. But the troublesome points had a
frog that was quite high causing not only a step on entry but also rocking the loco and lifting the wheels! So I set about filing the
cast metal frog (in the red border) until it was flat with the surrounding rail. I used a short straight stick as a gauge, sliding it over
the point work until it wasn't hitting a step or rocking greatly. Success! My 0-6-0 locos are now creeping through those points!
Magnetic uncoupling experiments
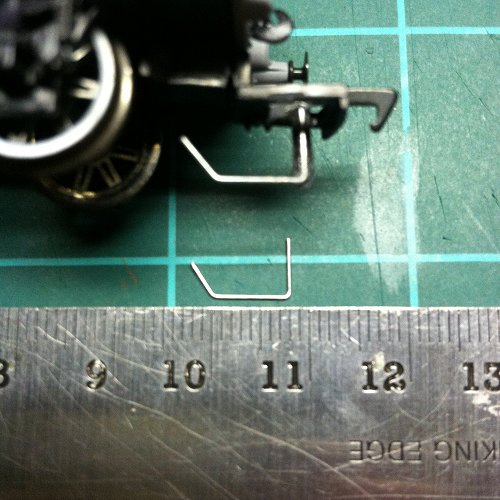
for ways to convert the British style tension-lock couplings. I decided to use a system that's credited to Brian Kirby along with
ideas from "Gormo's Shed," the informative Youtube channel by, yep, Gormo. The photo above left shows how a standard size
steel staple is bent and superglued onto the drop arm of a Bachmann coupler. On the right are two 1/8" cube neodymium
magnets glued between the sleepers. Very briefly; the staple is attracted to the magnets as the wagon is pushed over them and
causes the coupling hook to rise and uncouple with the next wagon or locomotive. So far it's working very well indeed. I plan on
writing a page to explain fully how I'm adapting and using the system. So look out for that as a tab at the top of the page soon.
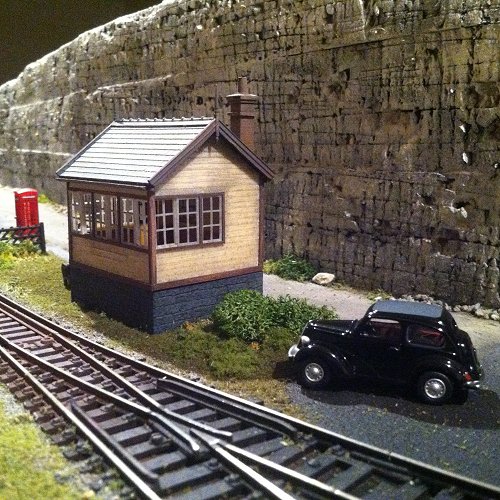
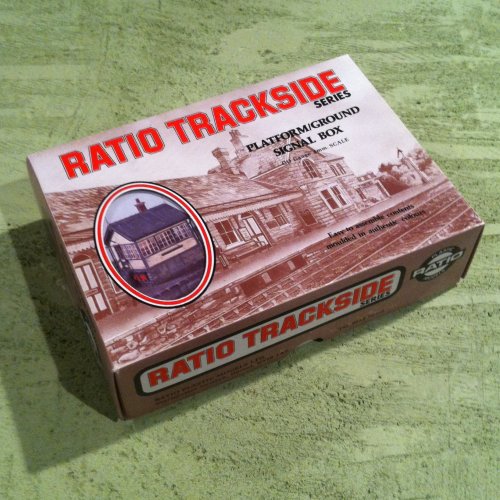
Signal box almost completed
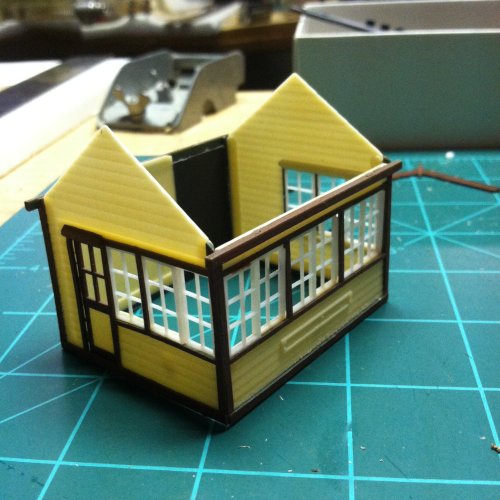
parts were not very good and many parts did not have any sort of locating tabs. Perseverance saved the day though and
the (almost finished) model looks good. I opted not to fit the glazing for now and will not glue the cabin to the base to keep
that option open. The wood framing was green so I sprayed that in a rusty red before construction. After construction I gave
the cabin a light spray of grey primer, particularly the roof and base, as a base for artists pastel colour. Pastel was used to detail
the roof and base brickwork in particular. Some red was drawn over the framing to suggest a weathered Midland red. Simple
stuff but it looks effective I hope. The signal box is shown in it's most likely position on the layout. It won't be glued down until
I'm sure it's the right place.
New siding progress
siding. Coarse and fine grasses plus lichen bushes produce the overgrown effect I'm going for here. This is as far as I will go until I
have the OO9 (N-gauge) track in place. I'm going to use N-gauge track as it will be more or less buried in the grass and the
incorrect sleeper size and spacing won't be noticed.
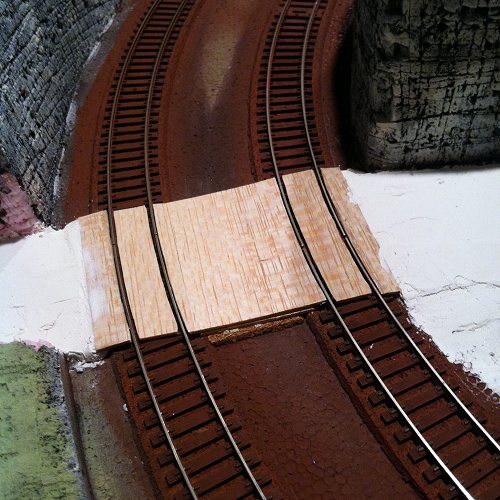
New siding
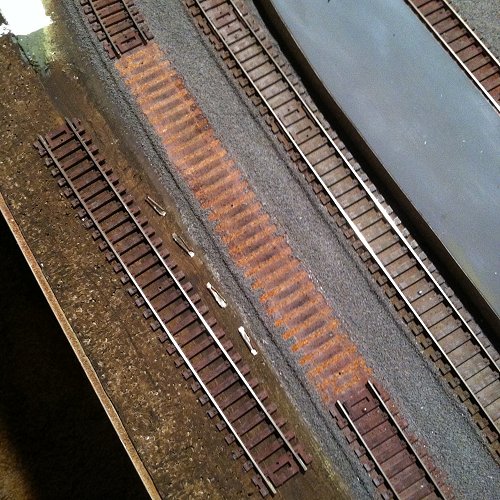
why not have it bring traffic to the main railway. So I created this new siding as an interchange area. The track consists of a #4
point and two lengths of set track. One was curved to create the required alignment. On the right is the length of track that was
removed to allow the (same length) point to drop in. I painted the new track rust coloured before fitting it over a new cork bed.
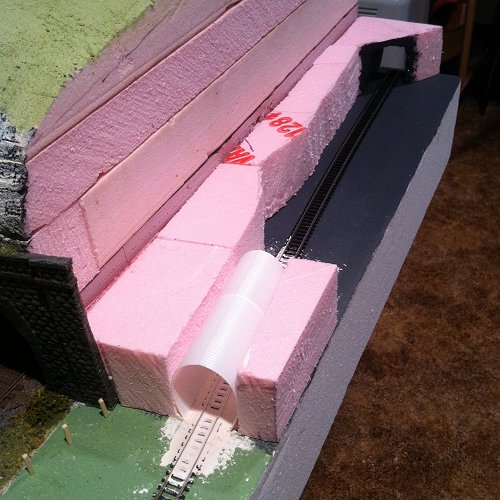
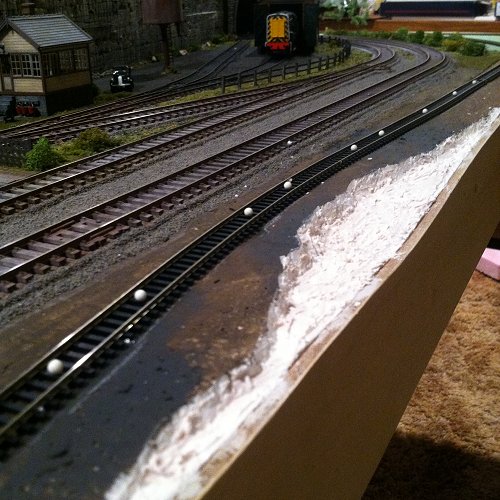
More baseboard extension work
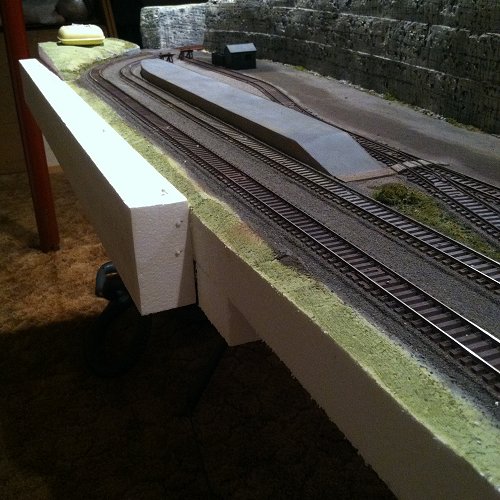
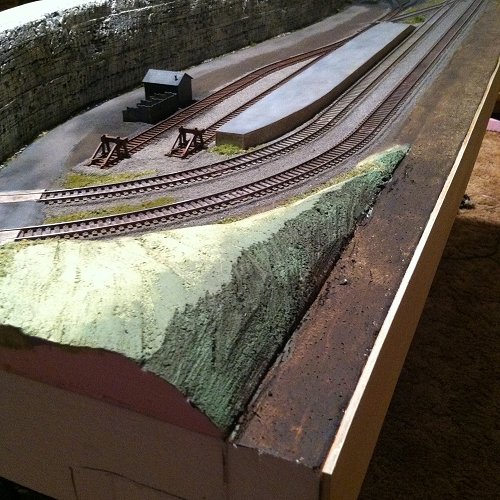
track all along the front edge. So I cut the wood fascia off and added a 2" x 4" white foam extension all along the front edge.
The photo on the right shows this after reattaching the fascia and painting the foam earth colour. I also re-shaped the low hill
in this corner. It's a little straight but I can disguise that with bushes and such.
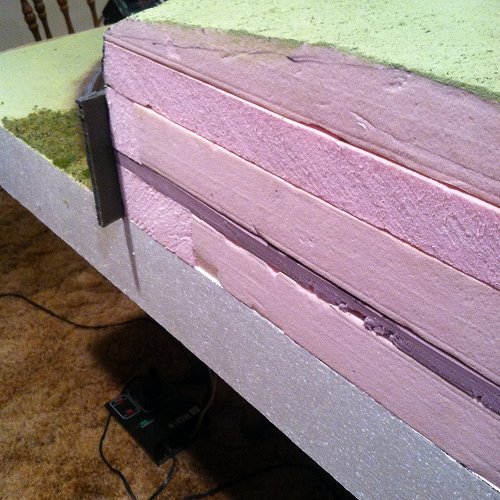
Baseboard extension action
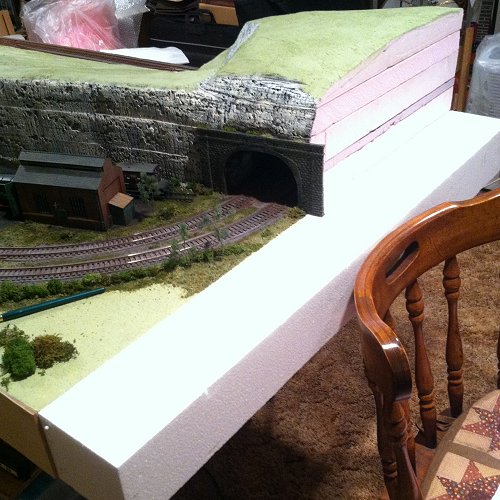
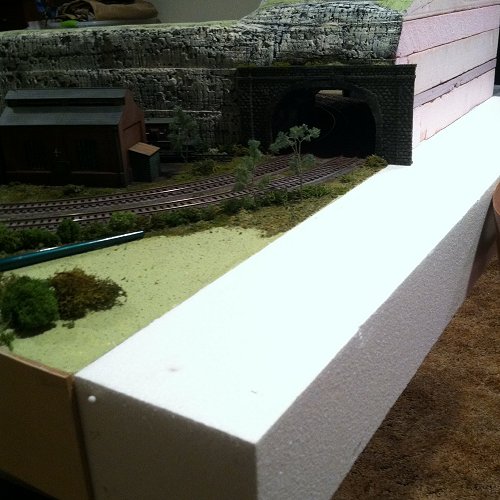
the Tacky Glue sets. Next I need to find some 2" thick pink foam to extend the limestone hill. I'm having thoughts about
sneaking a little 009 track into this area with a possible fiddle yard under the extended hillside.
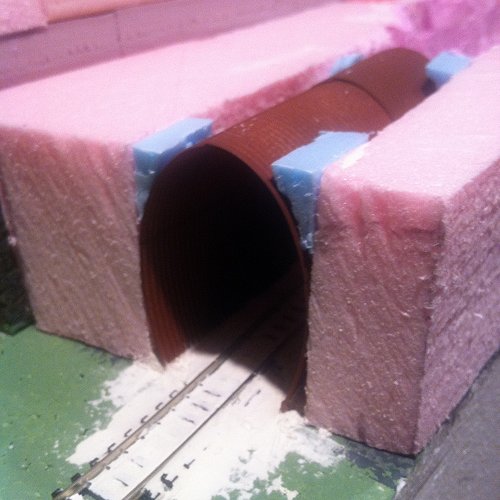
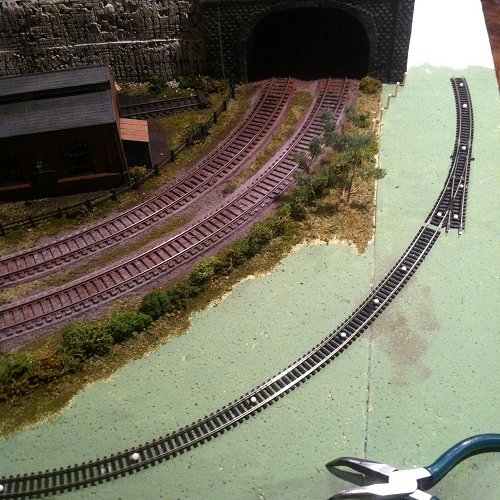
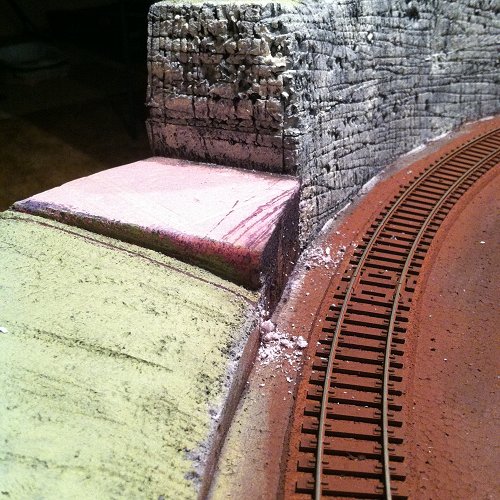
Baseboard extension decision
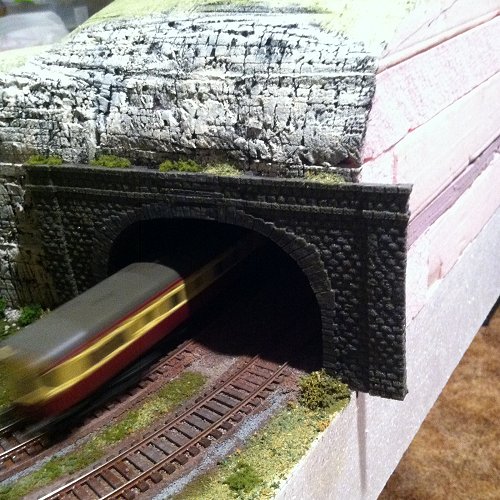
the baseboard. I really didn't want to cut the portal down so I left it. What I plan to do now is to add another two inches to the
length of the baseboard to bring the portal back onto solid ground as it should be! This will also give me a little more area in the
corner to develop scenically. I have two Nissen huts on order from England for that area.
More flora and tree planting
I also added a tree. I found a packet of very nice HO scale trees made by JTT Scenery Products. They are made using a wire
wound armature. I simply poked a hole into the foam base and pressed one in to see how it looked. No glue needed so I can
reposition it as I wish. Excellent trees I think.
A sudden growth of flora?
to use various scenic ground cover materials on the layout. Fine burnt grass, a coarse grass, and a mixed green grass "base"
were used here. Plus some lichen for shrubs and limestone "talus" for the rock debris at the base of the cliff. I am pleased with
just how much difference this is making! Magic!
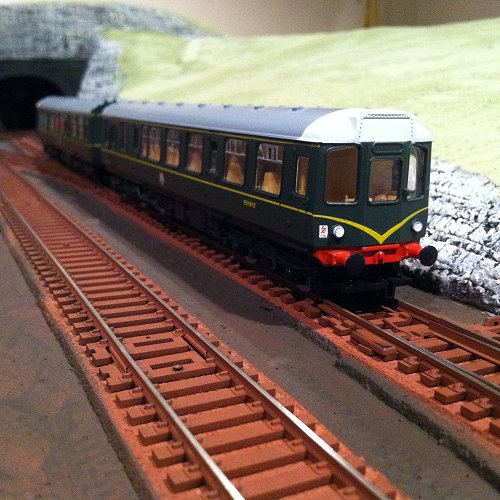
Some motive power work and a different view
The main drive gear was slipping which was fixed with the very careful application of a spot of instant glue. The electrical
pickups are very limited, only two wheels at each side of the drive unit so lots of stalling ensued. Today I thought I'd see if it
could be improved further. Initially running was still rough and it would derail the unpowered unit for no obvious reason. After some
very thorough track and wheel cleaning things improved. I found it works best when pushing the unpowered unit and in a partiular
direction around the layout. So I think that in this two car configuration, in a specific direction, and avoiding going into the yard
the running is finally quite acceptable! On the plus side the Class 110 was a classic sight in the Derbyshire countryside and this is
a perfect size model for a small layout. I do have a third car that would go in between the two (real life) driving units but it has
plastic wheels with small flanges and derails regularly.
On the right is an uncommon view from atop the hill near the east tunnel looking back to Millers Dale.
More of the level crossing
up the road where it has to slope up to the crossing. The sections of roadway in between were built up using 3/32" cork and two
layers of 1/16" balsa in between the track and one layer of balsa in between the rails (over the sleepers). I skimmed the middle
section of the balsa with filler. My plan was to produce a visualy interesting mix of wooden beams and ashphalt. On the right is
today's stage where I scored and weathered the wooden sections and painted the ashphalt road surface grey. The road goes
into the station area as ashphalt and then switches to limestone for the remainder (so far anyway). The oil staining seen was
created using a charcoal stick. I went on to paint over more areas of the baseboard with burnt umber acrylic to give a base earth
tone ready for grass or dirt scatter.
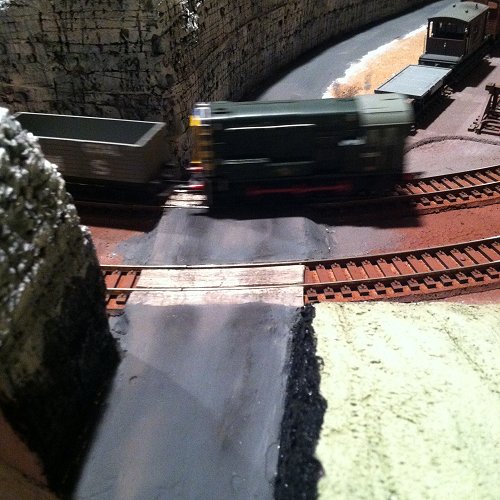
Beginning of the level crossing
the low bank. The cut edges were then scored to simulate the limestone rock which is now exposed. I also used smooth filler to
create the road going away into the distance.
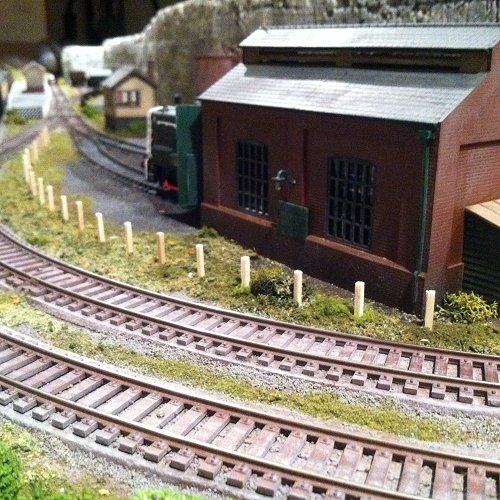
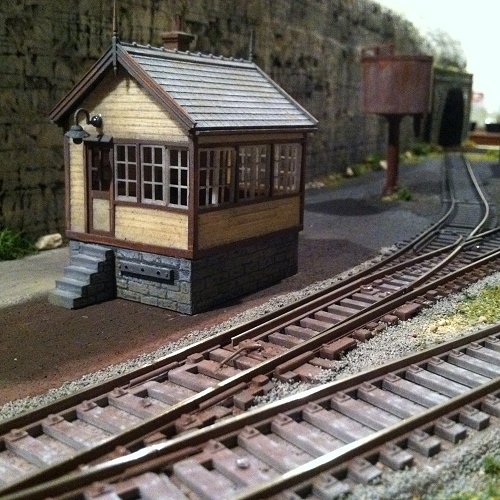
A signal box for Millers Dale

I was going to use at Millers Dale. I think it will look reasonably appropriate for my location, especially after painting the green
plastic areas in Midland red. That is something I should also do to the engine shed which currently has green doors and
details. More to come as I start building this very nice kit.
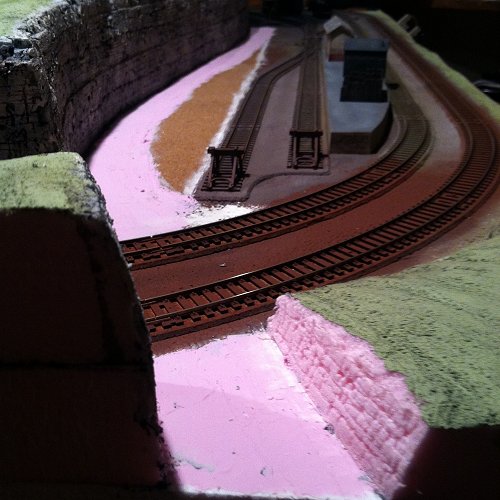
On the layout I added some extra cork base material at Millers Dale, so now only the proposed road area is uncovered. This will
level an area where the coal merchant and possibly a small loading dock will stand. This area also needs to accommodate a
small car park for the station. While working on this area I made some measurements to determine the height and length of
slope required for the road bridge that would bring traffic in and out of Millers Dale. This road would enter at the top of the right
hand photo (above) and run more or less where the weights are located and against the limestone edge. After making a quick
mockup, it was clear that this upward slope to the bridge will be quite restrictive and make it difficult to fit the coal merchant
into that area, so I think I'm going to put a level crossing there instead. This makes more sense with the lay of the land, too.
I think it will be a wood plank crossing with gates.